<p><div class="video"><iframe width="200" height="113" src="https://www.youtube.com/embed/SlShza3qy4E?feature=oembed" frameborder="0" allow="accelerometer; autoplay; clipboard-write; encrypted-media; gyroscope; picture-in-picture" allowfullscreen></iframe></div></p>
<p>ãªã³ã©ã¤ã³ã¹ã¤ã¼ãã¹ã¯ã¼ã«Saki.+ä¸å¶å²çµµã§ãã</p>
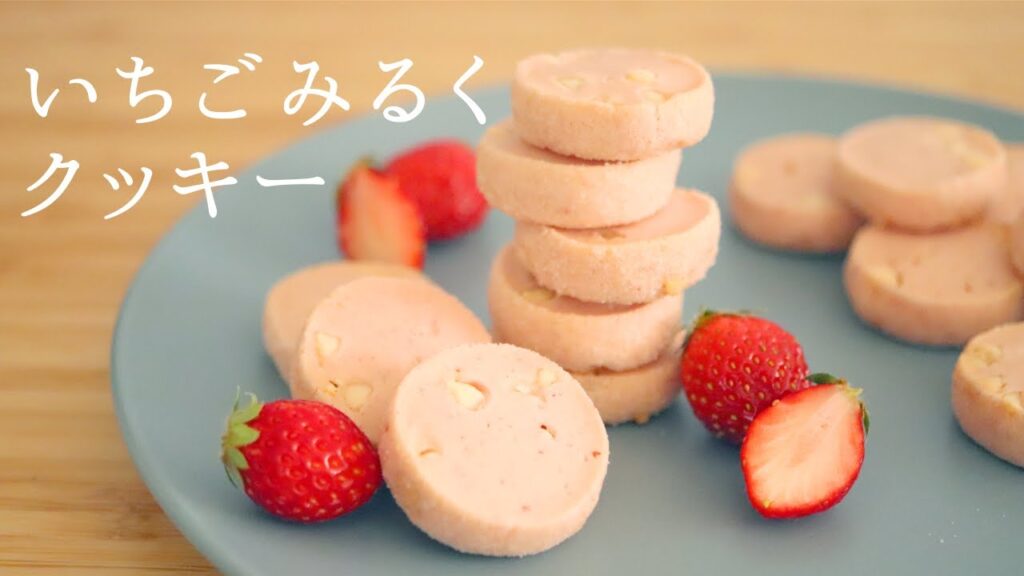
<p>ä»åã¯ãã¬ãã·ã¥ã®èºãå ããæ¥ã«ã´ã£ããã®ã¯ããã¼ããç´¹ä»ãã¾ãã<br />
ãµã¯ãµã¯ã¨ããããã¯ã¶ã¯ãã¨ãã質æã®ã¯ããã¼ã§ãã</p>
<p>ãã¦ãã¼ã使ããããè²ãé¦ããé¥ãã«è¯ãã§ãã<br />
èºã¯ã§ããã ã赤ããã®ãæèãç¹ç¶è³ªã®ãã®ã使ãã¨ããããªè²ãåºã¾ãã<br />
ï¼ä»åã¯ç´ ã»ã£ãºã使ç¨ï¼</p>
<p>æä»è¾¼ã¿ã»ãã¼ããä»è¾¼ã¿ã®2ã¤ããç´¹ä»ãã¦ãã¾ããããæ軽ã«ä»è¾¼ããªãæç¶ãã¼ãããããããã§ãï¼</p>
<p>é³å£°è§£èª¬ä»ããã¼ã¸ã§ã³ã¯ãã¡ãããã覧ãã ãã↓<br />
https://youtu.be/a3wWZ5qjxQ4</p>
<p>****************************************************</p>
<p>ãªã³ã©ã¤ã³ã§ãèåæ室ããã£ã¦ãã¾ãï¼</p>
<p>å ¬å¼HPããhttp://saki-plus.com/<br />
ã¡ã«ãã¬ã http://saki-plus.com/maillesson/<br />
Instagramãhttps://www.instagram.com/saki.plus/?hl=ja<br />
FaceBook http://www.facebook.com/sakie.nakajima.ss<br />
ãã®ä»ãã¢ããã¤ã¶ã¼ã»ã¬ã·ãéçºçãè¡ã£ã¦ãã¾ãã</p>
<p>****************************************************</p>
<p>Ingredients For about 20-25 sheets<br />
30g strawberry puree<br />
45g unsalted butter<br />
40g icing sugarã<br />
120g cake flour<br />
30g white chocolate chips<br />
Granulated sugar, to taste<br />
bread flour (if preparing by hand)</p>
<p>Preparation<br />
ã»Puree the strawberries in a blender.<br />
ã»If making by hand, let the butter come to room temperature.<br />
ã»Preheat the oven to 150°C before cutting the dough.</p>
<p>How to make<br />
â Preparation by hand<br />
(1) Bring the butter to room temperature and mix it with the powdered sugar.<br />
(2) Add the strawberry puree in three parts and mix.<br />
(3) Put the separated batter in the microwave for about 5 seconds and continue mixing with a whipper. Mix until the water and butter are well emulsified.<br />
(4)Sift the flour into the batter and mix with a rubber spatula.<br />
(5)When the flour is gone, add the chocolate chips, wrap in plastic wrap, flatten and let rest in the refrigerator for at least 1 hour.<br />
(6) When the dough has cooled down, crush it into small pieces on a clean table and quickly roll it into bars. Be careful not to take too much time, as the dough will soften quickly. Instead of rolling it vigorously, shape it into a stick little by little while letting out the air so that it does not become hollow. This time I stretched it out to 30cm.<br />
If the dough is too sticky, lightly dust it with flour.<br />
(7)Wrap in plastic wrap and chill in the freezer for 1 hour to harden.<br />
The time is a guide. Chill until firm enough to cut.</p>
<p>â Prepare in a food processor.<br />
(1)Cut the butter into dice and chill in the refrigerator.<br />
(2) Put all the ingredients except the strawberry puree into a food processor and process until the butter becomes a fine paste.<br />
(3)Add the strawberry puree and process until it comes together.<br />
(4)Remove the dough onto a clean table and add the chocolate chips.<br />
(5)Wrap in plastic wrap and chill in the refrigerator for 1 hour.<br />
(6) When the dough is chilled, crush it into small pieces on a clean surface and quickly roll into bars. Be careful not to take too long or the dough will soften quickly. Instead of rolling it vigorously, shape it into a stick little by little while letting out the air so that it does not become hollow. This time I stretched it out to 30cm.<br />
(7)Wrap in plastic wrap and chill in the freezer for 1 hour to harden.<br />
The time is a guide. Chill until firm enough to cut.</p>
<p>â Cutting and Baking<br />
(1) Put granulated sugar around the dough after taking it out of the freezer.<br />
(2) Spread the granulated sugar on the bat and roll the dough to coat firmly.<br />
(3)Cut the dough and place it on a baking sheet.<br />
(4)Bake in the oven at 150â for about 20 minutes. (4) Bake in the oven at 150â for about 20 minutes, turning the dough halfway through the baking time.<br />
Adjust the temperature so that the dough does not brown.</p>
<p>ãææãç´20ï½25æå<br />
èºãã¥ã¼ã¬ã30ï½<br />
ç¡å¡©ãã¿ã¼ã45ï½<br />
ç²ç³ã40ï½ã<br />
èåç²ã120ï½<br />
ãã¯ã¤ããã§ã³ãããã30ï½<br />
ã°ã©ãã¥ã¼ç³ãé©é<br />
â»å¼·åç²ï¼æä»è¾¼ã¿ã®å ´åï¼</p>
<p>ãä¸æºåã<br />
ã»èºã¯ãã¬ã³ãã¼ã«ããã¦ãã¥ã¼ã¬ç¶ã«ãã¦ãã<br />
ã»æä»è¾¼ã¿ã®å ´åã¯ãã¿ã¼ã室温ã«æ»ãã¦ãã<br />
ã»çå°ãã«ããããåã«ãªã¼ãã³ã150âã«äºç±ãã¦ãã</p>
<p>ãä½ãæ¹ã<br />
â æä»è¾¼ã¿<br />
â 室温ã«æ»ãããã¿ã¼ããªããããªç¶æ ã«ãããµãã£ãç²ç³ãå ãã¦æ··ããã<br />
â¡ç¶ãã¦èºãã¥ã¼ã¬ã3åã«åãã¦å ããæ··ããã2åç®è¾ºãããåé¢ãã¾ããç¶ãã¦å ãã¦ããã¾ãã<br />
â¢åé¢ããâ¡ã5ç§ç¨åº¦ã¬ã³ã¸ã«ããã¦ãã¤ããã¼ã§æ··ãç¶ãããæ°´åã¨ãã¿ã¼ããã£ããä¹³åããã¾ã§æ··ããã<br />
â£èåç²ããããã¦ãµããããããã´ã ãã©ã§åãããã«åããã¦ããã<br />
â¤ç²æ°ããªããªã£ãã¨ããã§ãã§ã³ããããå ãã¦ã¾ã¨ããã©ããã«å ã¿ãå¹³ãã«ãã¦å·èµåº«ã§1æé以ä¸ä¼ã¾ããã<br />
â¥çå°ããã£ããå·ããããããããªå°ã®ä¸ã§ç´°ããç ããææ©ãæ£ç¶ã«ã¾ã¨ãã¦ãããæéããããã¨ããã«çå°ãæããããªãã®ã§æ³¨æãããå¢ããã転ããã®ã§ãªãã空æ°ãæããªããå°ããã¤æ£ç¶ã«ãããã¨ã§ç©ºæ´åããªããªãã¾ããä»åã¯30cmã«ä¼¸ã°ãã¦ãã¾ãã<br />
â»ããã¤ãå ´åã¯æã¡ç²ã軽ãæã£ã¦ãã ãã<br />
â¦ã©ããã«å ã¿å·å庫ã§1æéå·ããåºããã<br />
â»æéã¯ç®å®ã§ããã«ããã§ããåºãã¾ã§å·ããã¦ãã ããã</p>
<p>â ãã¼ãããã»ããµã¼ä»è¾¼ã¿<br />
â ãã¿ã¼ã¯ãã¤ã¹ç¶ã«ã«ããããå·èµåº«ã§å·ããã¦ãã<br />
â¡ãã¼ãããã»ããµã¼ã«èºãã¥ã¼ã¬ä»¥å¤ã®ææãå ¥ãããã¿ã¼ãç´°ããªãã¼ãç¶ã«ãªãã¾ã§åãã<br />
â»ç²é¡ã¯ãµãããªãã¦å¤§ä¸å¤«ã§ã<br />
â¢èºãã¥ã¼ã¬ãå ããã¾ã¨ã¾ãã¾ã§åãã<br />
â£çå°ãããããªå°ã®ä¸ã«åãåºãããã§ã³ããããå ãã¦æ··ãè¾¼ãã<br />
â¤ã©ããã«å ã¿å·èµåº«ã§1æéå·ããåºããã<br />
â¥çå°ããã£ããå·ããããããããªå°ã®ä¸ã§ç´°ããç ããææ©ãæ£ç¶ã«ã¾ã¨ãã¦ãããæéããããã¨ããã«çå°ãæããããªãã®ã§æ³¨æãããå¢ããã転ããã®ã§ãªãã空æ°ãæããªããå°ããã¤æ£ç¶ã«ãããã¨ã§ç©ºæ´åããªããªãã¾ããä»åã¯30cmã«ä¼¸ã°ãã¦ãã¾ãã<br />
â¦ã©ããã«å ã¿å·å庫ã§1æéå·ããåºããã<br />
â»æéã¯ç®å®ã§ããã«ããã§ããåºãã¾ã§å·ããã¦ãã ããã</p>
<p>â ã«ããï½ç¼æ<br />
â å·åããåºããçå°ã®å¨ãã«ã°ã©ãã¥ã¼ç³ãã¤ããã<br />
â¡ãããã«ã°ã©ãã¥ã¼ç³ãåºããçå°ã転ããã¦ãã£ããã¤ããã<br />
â¢ã«ãããã天æ¿ã«ä¸¦ã¹ãã<br />
â£150âã®ãªã¼ãã³ã§ç´20åç¼æãéä¸ç¼è²ãè¦ãªããå転ãããã<br />
ç¼è²ãå ¥ããªãããã«æ¸©åº¦èª¿æ´ããã¦ãã ããã</p>
<p>â ä¸å¶å²çµµãããã£ã¼ã«</p>
<p>製èè¡ç師<br />
èå製é æè½å£«1ç´<br />
é«æ ¡åæ¥å¾ãããã£ã¹ãªã¼ã§11å¹´ä¿®è¡ã<br />
ç¬å¦ã§è£½èè¡ç師ãåå¾ã<br />
ãããããã£ã·ã¨ã®ç»ç«éãã¸ã£ãã³ã±ã¼ãã·ã§ã¼ã§4åº¦å ¥è³ã<br />
ãã®ä»å ¥è³çµé¨å¤æ°ã<br />
ãã®å¾ã製èå¦æ ¡æå¡ã¸è»¢è·ã<br />
ãèåãä½ãä»äºããæããä»äºã¨ããæ°ããªãã£ã¬ã³ã¸ãããã<br />
4å¹´éã製èå®ç¿ã¯ãã¡ãã製èçè«ãªã©ã座å¦ææ¥ãåãæã¤ã<br />
ãæãããä»äºã«ãããããæããç¾å ´ã§å¹ã£ãæè¡ã¨å°éå¦æ ¡ã§ç£¨ããæããã¹ãã«ãçãã<br />
å ¨å½ã©ãããã§ãåè¬ã§ããããªã³ã©ã¤ã³ã¹ã¤ã¼ãã¹ã¯ã¼ã«ã®ç«ã¡ä¸ãã決æããã</p>
<p>2019å¹´12æãªã³ã©ã¤ã³ã¹ã¤ã¼ãã¹ã¯ã¼ã«Saki.+ãéè¬ã</p>
<p>#ã¯ããã¼<br />
#ãèåä½ã<br />
#ãã¡ãã¿ãã<br />
#ããã®ã¬ã·ã<br />
#ããã£ã·ã¨</p>


【いちごみるくクッキー】【Strawberry Milk Cookies】の作り方/パティシエが教えるお菓子作り!